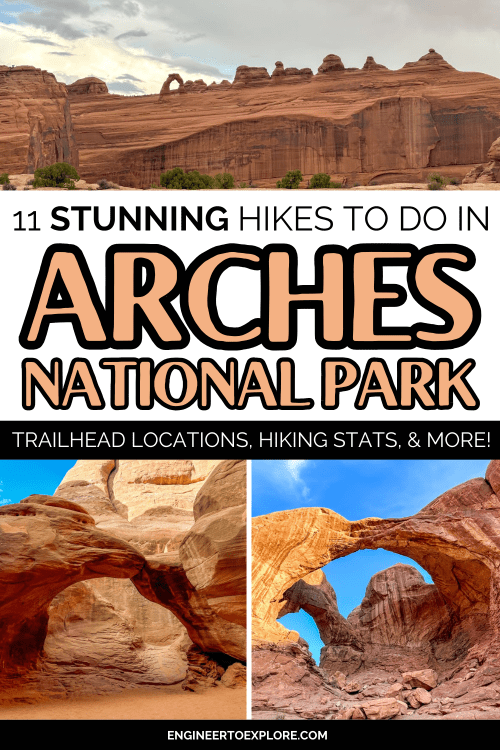
Arches National Park is home to an incredible collection of sandstone arches and unique rock formations.
Most of the hikes here are short walks to a viewpoint, but there are a few trails that are more challenging and feel more remote.
After implementing a timed entry system in 2024, Arches is much less crowded now than it used to be and makes for a much better experience. You’ll notice less crowded trails and be able to find parking more easily.
We visited Arches National Park in October of 2024 and had a great time exploring the viewpoints and hiking lots of the trails here on our week-long trip to Moab. It is a pretty compact park with short hikes, so you can do a lot in just a day or two!
This post is all about the 11 best hikes in Arches National Park. I’ll include hiking stats, permit information, and practical tips for hiking each trail.
Arches National Park Overview
Arches National Park is a compact park located near Moab, Utah. It has one entrance and one Visitor’s Center located right off of Highway 191 north of town.
Arches National Park Road (often referred to as the “Arches Scenic Drive”) is the main road that runs mostly north-south through the park. Most of the park attractions are located off of this road.
There are a few main sections in Arches to explore: Courthouse Towers, The Windows, Delicate Arch, The Fiery Furnace, and Devil’s Garden.
I’ve annotated the map below with some of the major points of interest, but you can download a high-resolution map here.
Related: Arches National Park Itinerary: How to Spend 1, 2, or 3 Days in Arches

The Best Time to Visit Arches National Park
The best time to visit Arches National Park is in the spring or fall. Temperatures in the Moab area are brutally hot in the summer, plus the parks will be swarmed with people once the kids are out of school.
In Utah, most hikes don’t have treecover to shade the trails, so you get full sun exposure most of the time. It’s important to prioritize hiking early or late in the day because of this.
October is another busy time to visit since you get all the fall breakers, but the weather is perfect for hiking. However with the timed entry system, crowds in the park were much lower than I expected, so I wouldn’t worry too much about this. If you really want to avoid the crowds, try visiting the last week of October or early November instead.
We visited in the middle of October and had daily highs in the 80s for most of the week, but the morning and evening temperatures were perfect. Almost everyone we met in Moab was there for fall break.
Visiting Arches in the winter can also be a magical time to visit, especially if you get lucky with a dusting of snow. Large amounts of snow are rare, so it’s unlikely that park roads would become impassable. Going in the winter means shorter days and colder temperatures, but also much lower crowds.
Related: Top 16 Things to Do in Arches National Park

Fees & Timed Entry Requirements
In 2024, Arches National Park implemented a timed entry system to help with traffic congestion and parking issues. Between April 1st and October 31st, you will need a timed entry slot to enter the park between 7 am and 4 pm. You do not need a timed entry permit if you enter the park before 7 am or after 4 pm.
A timed entry ticket costs $2.00 and does not include admission to the park. This permit gives you 1 hour to enter the park entrance gate (ex. purchasing timed entry for the 8-9 am or 2-3 pm time slot means you have that hour to enter the park gates and can stay in the park for as long as you’d like).
I suggest purchasing your timed entry ticket(s) a few weeks ahead of time as the earlier time slots and weekend slots tend to sell out quickly. Purchase timed entry here.
Admission to Arches National Park costs $35 per vehicle, unless you have the America the Beautiful National Park Pass.
If you plan to visit 3 or more National Parks or Monuments on your trip to Utah (or within one year), getting the America the Beautiful National Park Pass will save you money vs. paying the separate fees at each park. It costs $80 and you must order ahead of time as they will ship you a physical pass.
OUR EXPERIENCE: I purchased a timed entry slot for 8 – 9 am on 2 separate weekdays, but we didn’t end up using it. We started our days in Arches early and got to the park around 6:30 am to do sunrise hikes. If you don’t mind early mornings, I highly recommend this as the crowd levels are much lower, sunrise is gorgeous, and hiking in cooler weather is much nicer.
How Many Days Do You Need in Arches National Park?
Since Arches is such a compact park, you can see a lot of it in just one day. However, if you want to see the highlights and do the iconic hike to Delicate Arch in one day, prepare for a long day with a lot of walking and hiking (roughly 10 miles).
If you’d like to see the main highlights, do a longer hike, visit the remote Klondike Bluffs section of the park, and/or explore the Fiery Furnace, I recommend spending 2-3 days in Arches National Park.
11 Stunning Hikes in Arches National Park
1. Delicate Arch
Length: 3.2 miles
Elevation gain: 629 feet
Type: out-and-back
Difficulty: moderate
Time: 2 hours
Trailhead location: Delicate Arch

If you only have time to do one hike in Arches National Park, make it Delicate Arch!
Not only is Delicate Arch used as the symbol of Utah (it’s on all of the Utah license plates), it’s also used as a symbol for the entire National Park Service.
This hike is short and steep, but it’s absolutely worth the trek to get up close and personal with the arch.
The trail starts out easy, and will take you past the Wolfe Ranch Cabin and some petroglyphs.
You’ll then have a steep climb up some slickrock and then you’ll hike along the edge of a large sandstone dome with a steep drop off to your left. When you finally make it around the bend, your jaw will drop at the view of Delicate Arch!
When you finally reach Delicate Arch, you will forget about all of the huffing and puffing you did to get here.
There will be a lot of people on this trail as it’s the most popular thing to do at Arches (everyone needs to get the Instagram photo of them standing under the arch). You will have to wait in line to get a photo of you under the arch, but that’s okay since the scenery is incredible!
My biggest tip for this trail is to do it at sunrise or sunset. If you go in the middle of the day, the sun will wash out your photos and it will be hot and crowded.
We hiked to Delicate Arch at sunrise on a weekday and got there just before the sun crested the surrounding mountains, which made for incredible photos without the sun being too bright.
Related: How to Hike to Delicate Arch in Arches National Park
2. Landscape Arch
Length: 1.9 miles
Elevation gain: 252 feet
Type: out-and-back
Difficulty: easy
Time: 1 hour
Trailhead location: Devil’s Garden
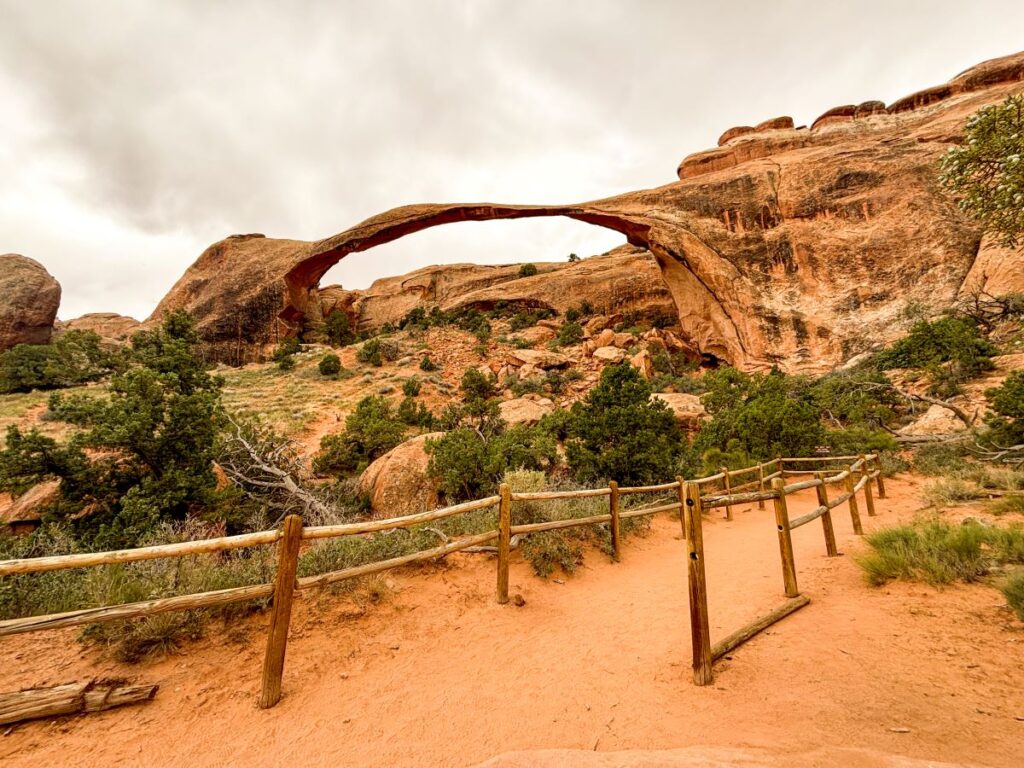
Landscape Arch is the longest arch in North America, spanning 306 feet. It is only 6 feet in diameter at its narrowest point.
Large segments of this arch actually collapsed in the 90’s, so who knows how much longer Landscape Arch will be around to enjoy! Hiking here is another popular hike to do in Arches National Park.
Landscape Arch is located along the Devil’s Garden Trail, about one mile in. You’ll also see Partition Arch to the right of Landscape Arch from this viewpoint as well.
I also recommend doing the short detours to Tunnel and Pine Tree Arch on the way to Landscape Arch (this will add about half a mile to your hike, bringing the total distance to 2.4 miles).
The trails to Landscape, Tunnel, and Pine Tree Arch are well-marked and easy to follow. Even if you don’t plan to hike the entire Devil’s Garden Trail, plan on hiking to Landscape Arch at a minimum during your visit.
3. Devil’s Garden Trail
Length: 7.9 miles
Elevation gain: 1085 feet
Type: loop
Difficulty: strenuous
Time: 4 hours
Trailhead location: Devil’s Garden
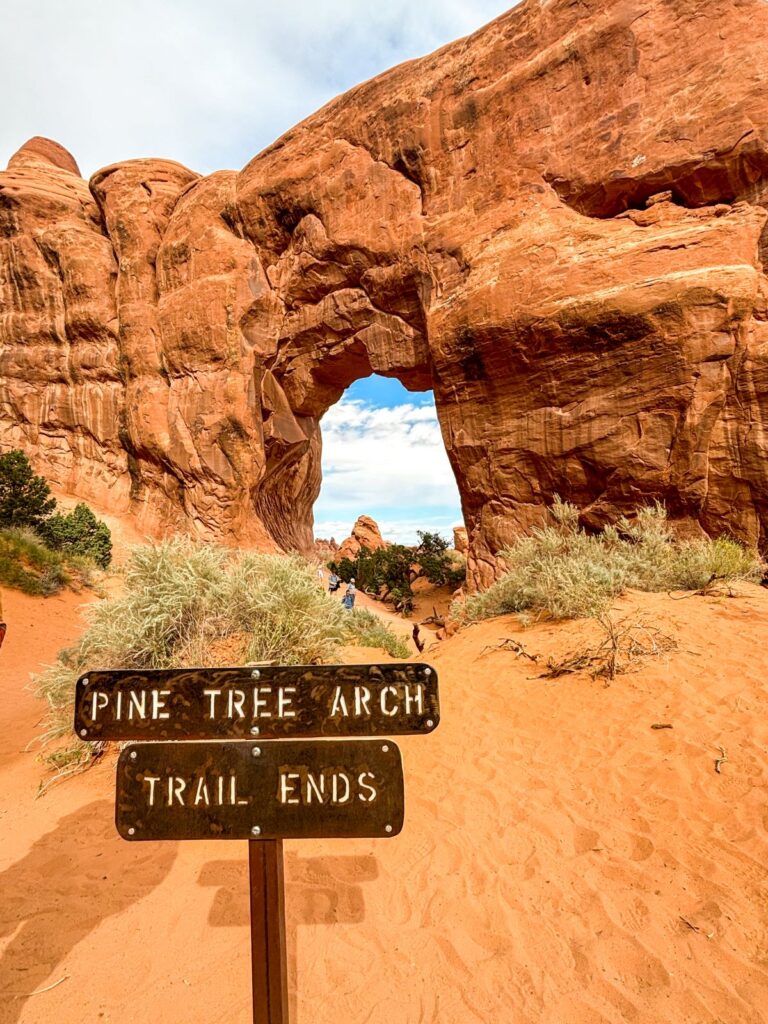
The Devil’s Garden Trail is consistently ranked as one of the best hikes in Arches National Park (after Delicate Arch). The portion of the trail to Tunnel, Pine Tree, and Landscape Arch is easy, but it does become challenging once you hike past Landscape Arch.
You will see 7 total arches on this trail, hike on top of a steep fin, use your route finding skills on the primitive portion of the trail, and admire sweeping views of the area. There are lots of ups and downs and plenty of rock scrambling opportunities as well.
You’ll definitely want to download the offline map so you don’t get lost on the primitive trail. Don’t forget to bring plenty of water, snacks, and wear good hiking shoes.
We unfortunately didn’t have time to hike this entire trail, and only hiked the easy portion to Pine Tree, Tunnel, and Landscape Arch. At a minimum, you definitely need to hike this portion of the trail. Next time we are in Moab, we will be hiking the entire loop!
4. Sand Dune & Broken Arch
Length: 2.8 miles
Elevation gain: 321 feet
Type: loop
Difficulty: easy
Time: 1-2 hours
Trailhead location: Devil’s Garden
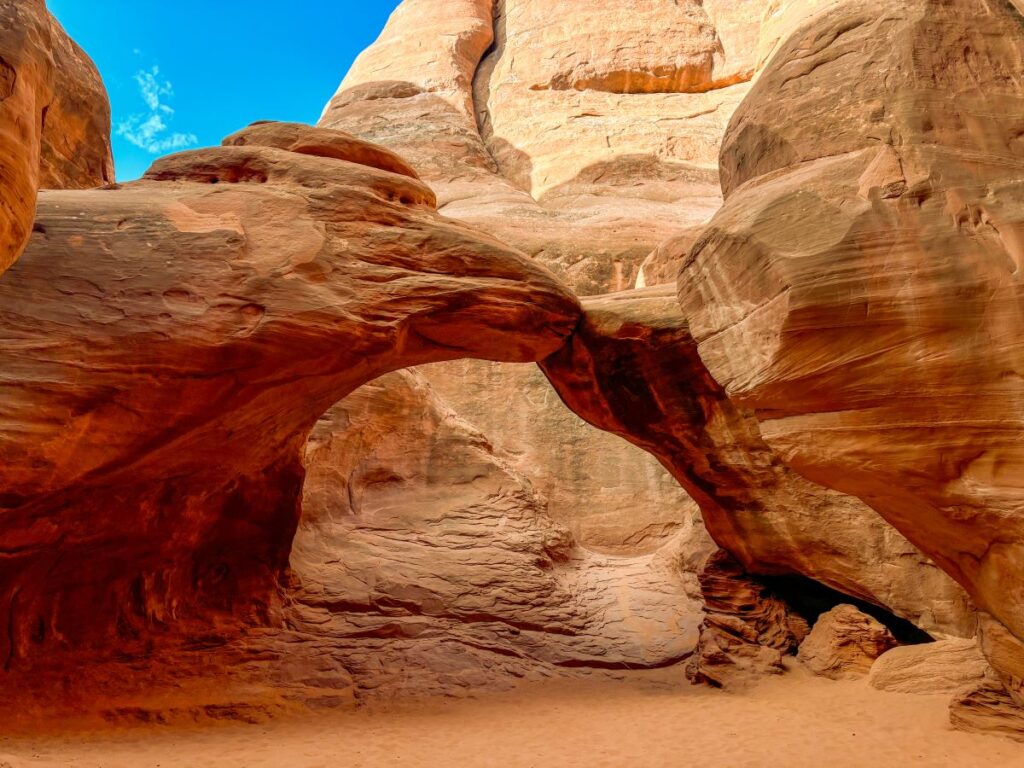
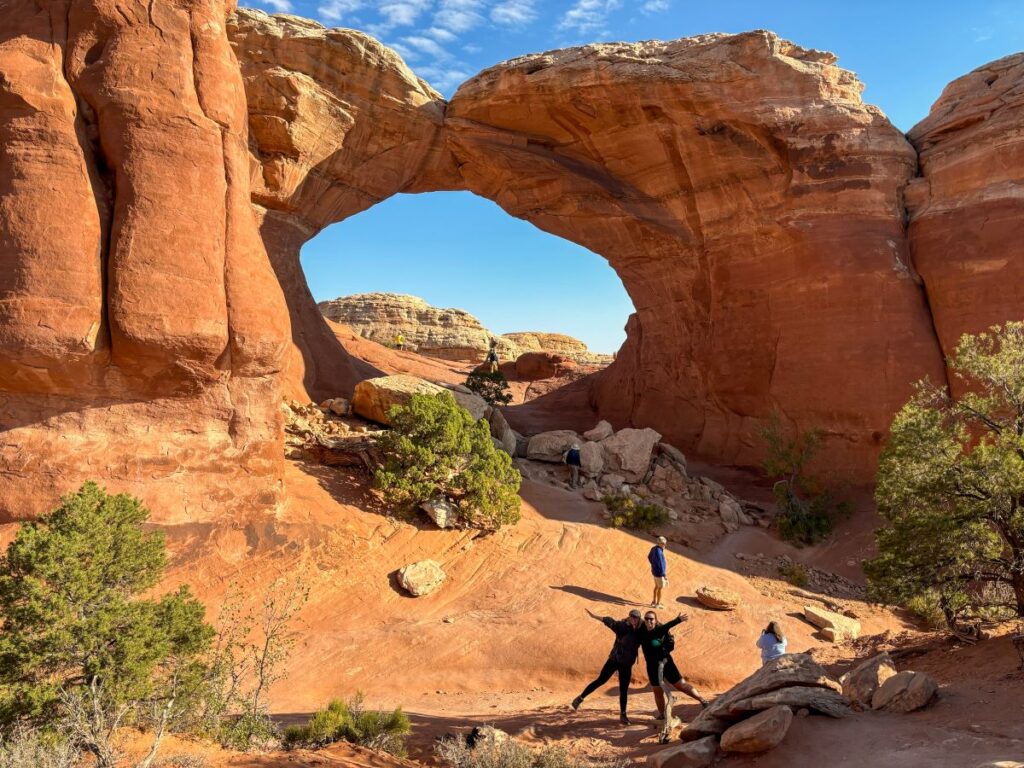
Sand Dune, Broken, and Tapestry Arch can be visited by a short loop trail that connects all 3 arches.
You can hike the entire loop for a total of 2.8 miles and 321 feet of elevation gain, or hike it as an out-and-back just to Sand Dune and Broken Arch (what we did) for a shorter, 1.5-mile hike.
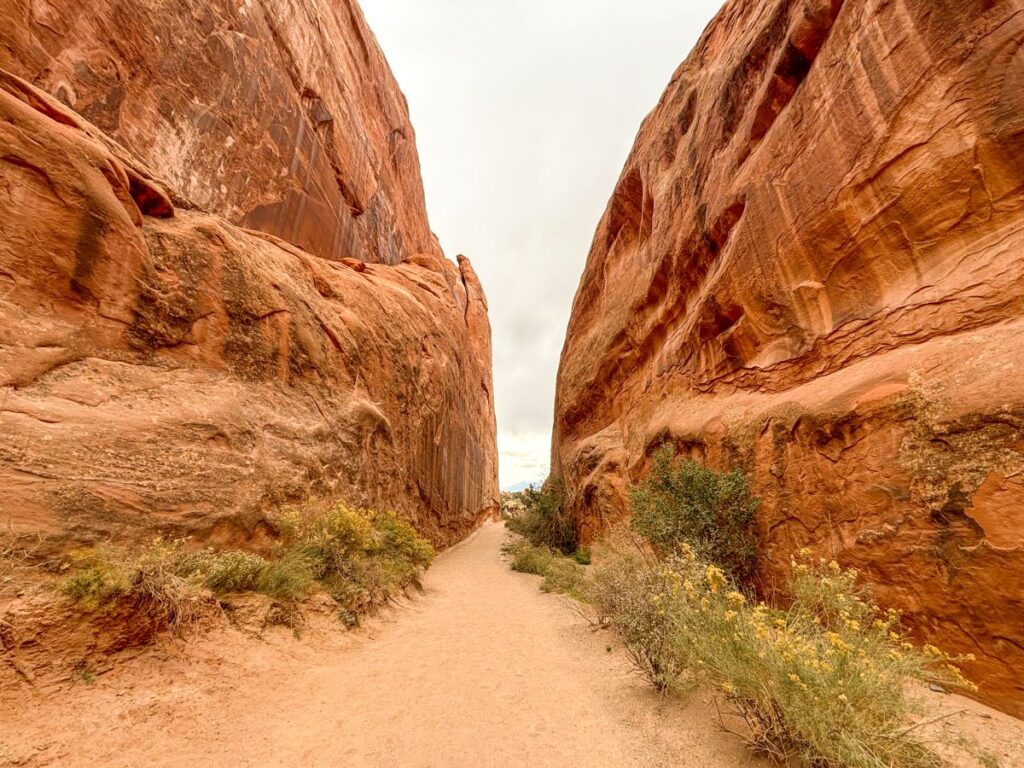
Sand Dune Arch is tucked in a large slot canyon through a sandy wash, and was a delightful surprise when we turned to the right and saw it.
Broken Arch doesn’t look broken until you get up close and see the crack through the middle.
This is a fun, easy trail with unique scenery. Definitely don’t miss it on your trip to Arches!
5. Double Arch
Length: 0.6 miles
Elevation gain: 95 feet
Type: out-and-back
Difficulty: easy
Time: 30 minutes
Trailhead location: The Windows
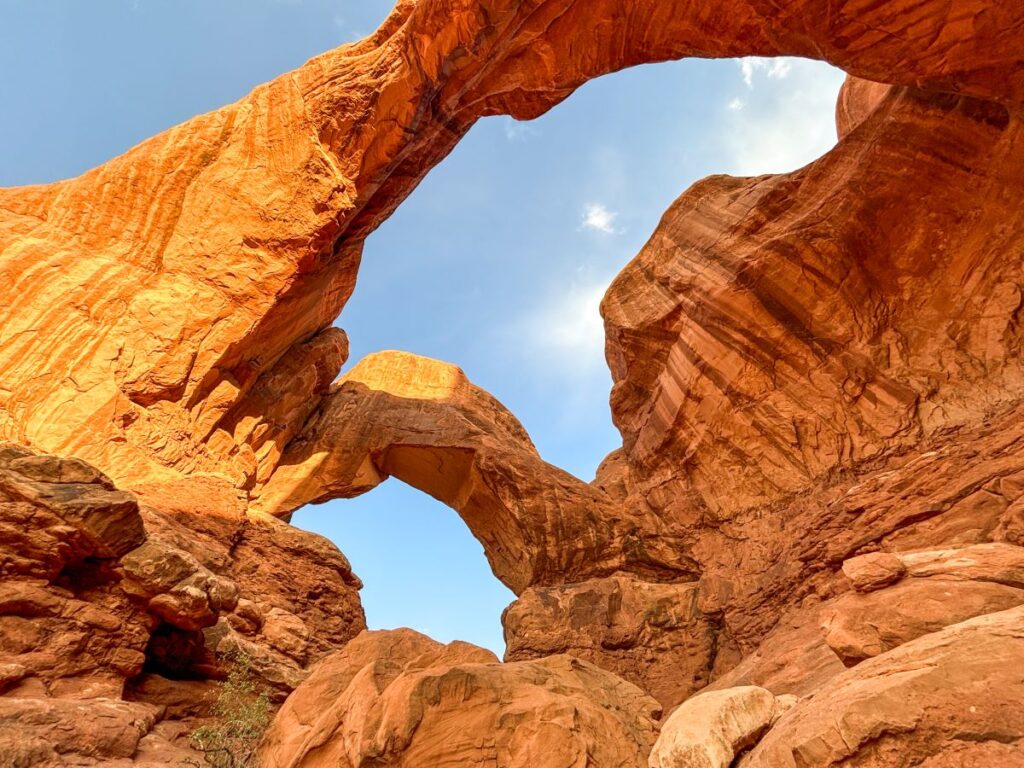
Double Arch is another short, easy hike in Arches that you should not miss.
Double Arch is just what you think it is- 2 arches that share the same stone and connect on one side.
Double Arch was formed from downward water erosion. Millions of years ago when this area was just a rock, pools of water formed on top of the sandstone (potholes). Over time with the freeze-thaw cycle, that water slowly eroded the top of the stone until a hole formed and created Double Arch.
Double Arch is located near The Windows section of the park. You can climb up under the arch and get some really cool photos. Standing underneath Double Arch also causes an echoing effect, so it’s best to be quiet and listen to the sounds of nature here.
We did this trail shortly after sunrise and had it all to ourselves for a brief moment. It was truly incredible!
6. Windows Loop & Turret Arch
Length: 1.2 miles
Elevation gain: 154 feet
Type: loop
Difficulty: easy
Time: 30 minutes
Trailhead location: The Windows
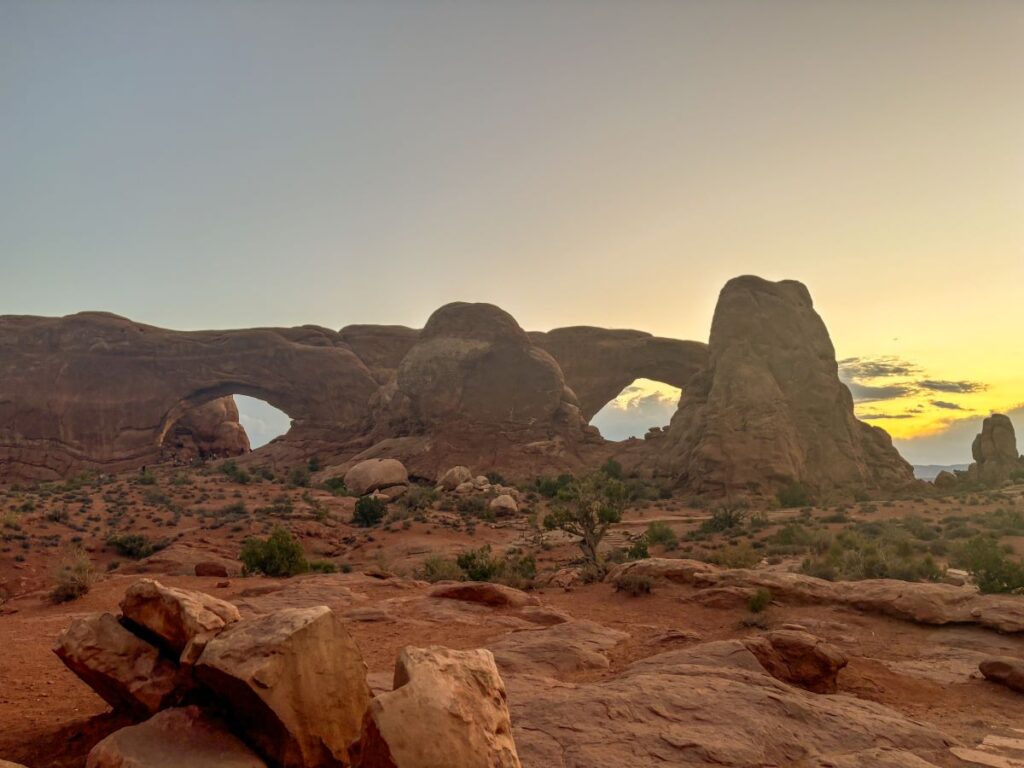
The Windows Loop Trail is one of the most popular hikes in Arches National Park, especially for sunrise.
This short, gravel trail takes you to 2 arches: the North and South Windows. The arches are carved into a large sandstone wall, so they kind of look like windows in a house.
The Turret Arch Trail spurs off this trail as well, so most people hike to all 3 arches at the same time. Doing the trail this way results in an easy 1.2 mile hike with negligible elevation gain.
This is a great hike to do at sunrise. You’ll see lots of people gathered in the North Window looking east to watch the sun rise over the horizon.
The scenery looking out of the North Window is absolutely breathtaking!
7. Upper Delicate Arch Viewpoint
Length: 1.0 miles
Elevation gain: 177 feet
Type: out-and-back
Difficulty: easy to moderate
Time: 30 minutes
Trailhead location: Delicate Arch

Delicate Arch is definitely best viewed by hiking the main trail up to it, but there are 2 viewpoints that you can see it from if you’re not up for a strenuous hike. Both viewpoints are located in the same area.
The Upper Delicate Arch Viewpoint Trail is a short, steep hike up to a viewpoint of Delicate Arch. Keep in mind that this viewpoint will still be from far away.
If you don’t have the time or energy for the big hike to Delicate Arch, the Upper Viewpoint can be a good alternative.
There is also another viewpoint of Delicate Arch located in this area and doesn’t require any hiking. It’s just a short walk to an overlook where you can see Delicate Arch way off to the distance.
8. Park Avenue
Length: 1.8 or 0.9 miles
Elevation gain: 308 feet
Type: out-and-back or point-to-point
Difficulty: easy
Time: 30 minutes to 1 hour
Trailhead location: Courthouse Towers
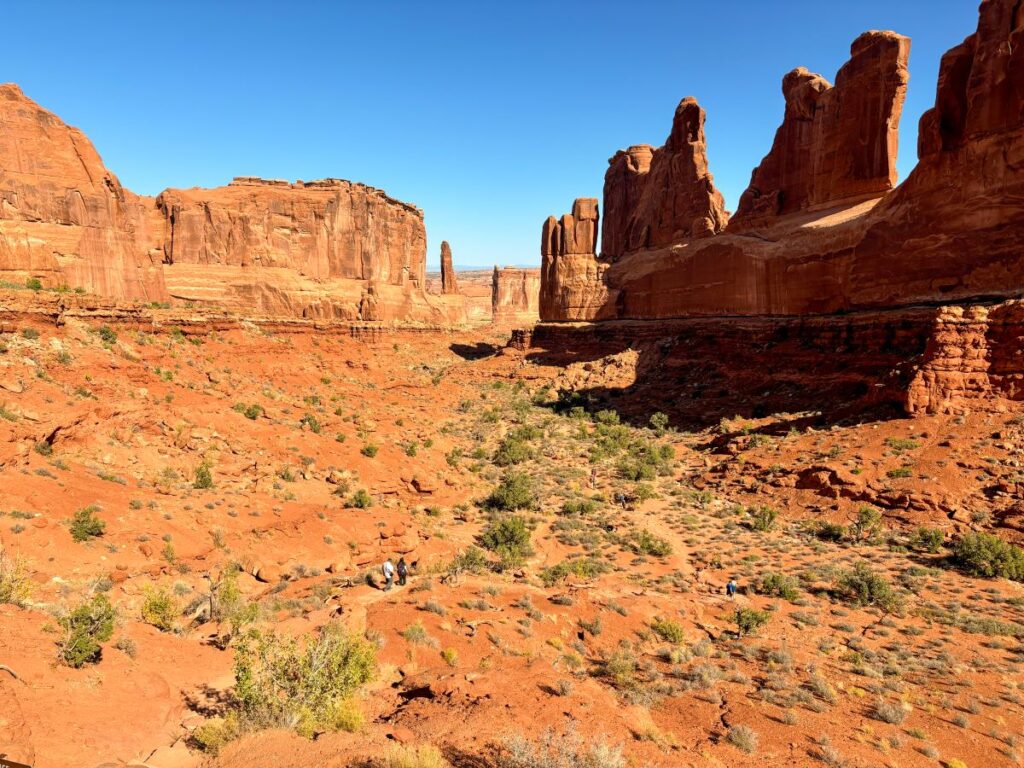
Park Avenue is a unique valley full of stunning rock formations near the entrance gate to the park. You’ll see the Courthouse Towers and the La Sal Mountain Range as well. There are no arches here, but the scenery is great!
The Park Avenue Trail connects Park Avenue with the Courthouse Towers Viewpoint. You can hike down through Park Avenue to the Courthouse Towers on a point-to-point hike, or return back the way you came for an out-and-back hike.
If someone in your group doesn’t mind not hiking, they can drop you off at Park Avenue and then pick you up at the Courthouse Towers. This point-to-point version of the hike will all be downhill and you’ll clock just under a mile of distance vs. the 1.8 miles if you did it round trip.
We skipped doing this hike, but we did visit the Park Avenue Viewpoint. I feel that there are better short hikes in the park, so I would skip it for now unless you have multiple days to explore the park.
9. Skyline Arch
Length: 0.4 miles
Elevation gain: negligible
Type: out-and-back
Difficulty: easy
Time: 30 minutes
Trailhead location: Devil’s Garden
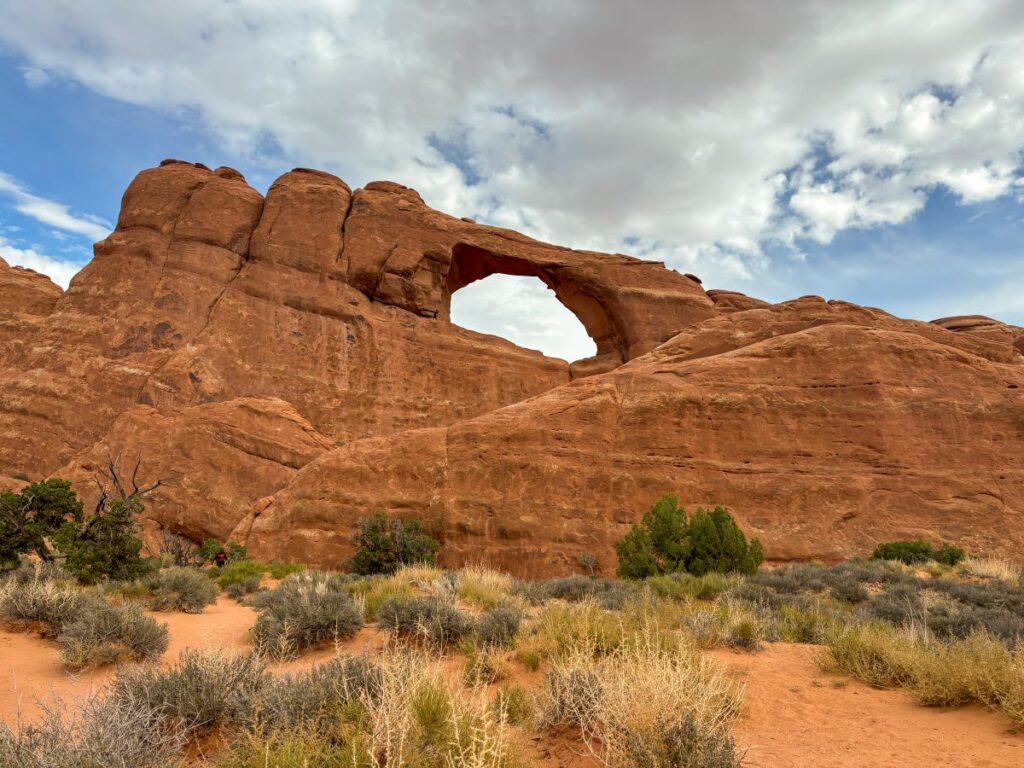
Skyline Arch is another short, easy hike to an arch. You can actually see this one from the road, so it doesn’t technically require any hiking, but the view from close-up is much better.
The flat hike will take you to some large rocks that you can scramble up right in front of the arch. This area also seemed to be less crowded than other areas of the park, and we had the end of the trail all to ourselves during the middle of the day.
10. Fiery Furnace (Permit Required)
Length: 2.1 miles
Elevation gain: 492 feet
Type: loop
Difficulty: moderate to strenuous
Time: 2-3 hours
Trailhead location: Fiery Furnace
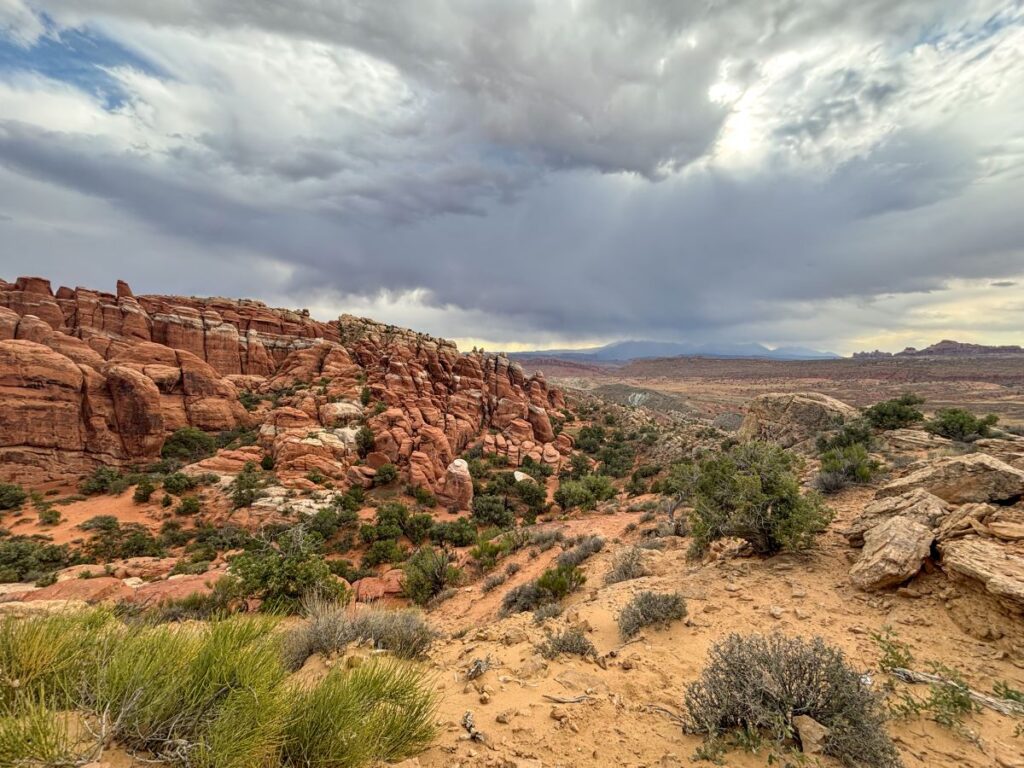
The Fiery Furnace is a maze of sandstone fins that turn a reddish hue at sunset. If you get lucky enough to score a hiking permit, you can wander the labyrinth of fins, slots, and abrupt dead ends inside the Fiery Furnace.
While there really isn’t an official “trail” through the Fiery Furnace, AllTrails has a 2.1 mile route that you can follow if you download the offline map. I’m sure you will be hiking more than the 2.1 miles though because you can wander as you please and get lost!
This experience requires a permit though. You can book a ranger-led hike through the Fiery Furnace if you visit in the summer, or apply for a permit to take a self-guided tour.
Permits for hiking the Fiery Furnace are released at 8 am Mountain Time on a rolling 7-day window and sell out quickly, especially on weekends and during peak season. My suggestion is to set a calendar reminder a week before you want to hike and try for a permit as soon as the window opens.
If you get a hiking permit for the Fiery Furnace, you will not need a timed entry permit to enter Arches National Park. The self-guided Fiery Furnace permit is good for all day, and you can enter the park whenever you’d like!
Since we visited in October, the Ranger-led hike wasn’t an option and we unfortunately were not successful in getting a self-guided hiking permit.
Read more about visiting the Fiery Furnace and book hiking permits on the NPS website here.
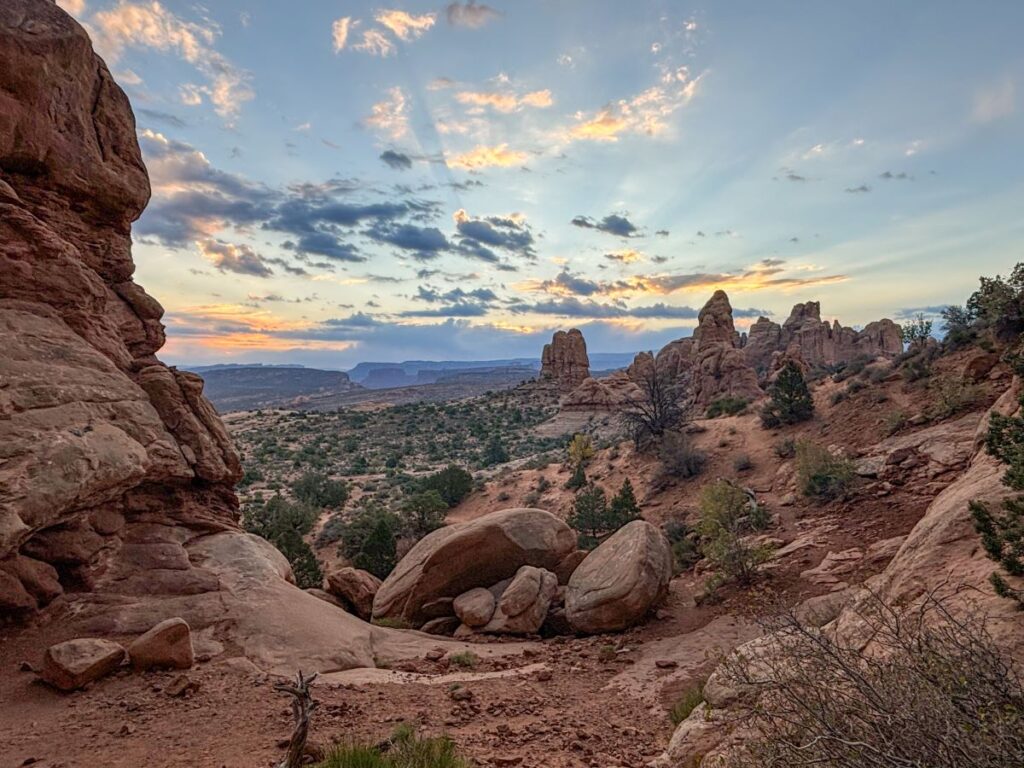
11. Tower Arch
Length: 2.5 miles
Elevation gain: 626 feet
Type: out-and-back
Difficulty: moderate
Time: 2 hours
Trailhead location: Klondike Bluffs
Hiking to Tower Arch requires a little bit of off-roading to get to the remote section of the park where the trailhead is located in the Klondike Bluffs.
The Klondike Bluffs section of the park is a seldom-visited, remote area. It requires driving 7.5 miles on a dirt road to get here.
This road is fine in a 2WD car as long as it’s not raining or snowing. There is a turnoff for Salt Valley Road between the Devil’s Garden and Fiery Furnace areas of the park.
Tower Arch is tucked behind the bluff, so you will have to hike to see it (it’s not visible from the road like many of the arches in the park are). It’s a 2.4-mile trail with 600 feet of elevation gain.
If you want to ditch the crowds, hiking to Tower Arch is a great way to do so!
Best Hikes in Arches With Limited Time
As you can see from this list of hikes in Arches National Park, there are mainly short, easy trails here.
If you have one day to spend in Arches and want to see the highlights, I recommend prioritizing the following trails:
- Delicate Arch
- Landscape Arch (with detours to Tunnel and Pine Tree Arches)
- Sand Dune & Broken Arch (short version)
- Double Arch
- Windows Loop & Turret Arch
- Skyline Arch
I know this is a big list that requires almost 10 miles of hiking. If this list is a bit too ambitious for you, you can drop the hike to Delicate Arch (although I would really prioritize doing this one) and opt for the Upper Delicate Arch Viewpoint instead.
Alternatively, you could skip the Sand Dune & Broken Arch Trail as well.
If you’re looking for a more strenuous or remote hike, I’d recommend the Devil’s Garden Trail, a self-guided tour through the Fiery Furnace, and/or the hike to Tower Arch.
Feel free to check out my 1, 2, or 3 day Arches National Park itinerary for more details on how to plan your time here.
Which of these hikes in Arches National Park are you most excited for? Let me know in the comments below!
-Megan
More Information on Southern Utah
MORE ON ARCHES NATIONAL PARK: Check out the ultimate 1, 2, or 3 day Arches itinerary, how to see Delicate Arch, and my list of the 16 top things to do in Arches.
CANYONLANDS NATIONAL PARK: Explore Arches’ neighboring National Park by checking out the 15 best things to do in the Island in the Sky District, 12 great things to do in The Needles, or my guide on driving the Shafer Canyon-Potash Road Loop. I’ve also got a Canyonlands itinerary for 1-5 days and a list of the best hikes in Canyonlands.
DEAD HORSE POINT STATE PARK: This state park provides an incredible panoramic vista over the Colorado River, and it’s on your way to Canyonlands Island in the Sky District.
CAPITOL REEF NATIONAL PARK: Visit Utah’s most underrated National Park located just 2 hours west of Arches. Check out my 1-4 day Capitol Reef itinerary, the top things to do in Capitol Reef, and the best hikes in Capitol Reef.
HANKSVILLE, UTAH: Hanksville is a tiny town between Capitol Reef and Moab that is near some otherworldly landscapes. Here’s how to visit Factory Butte and the Moonscape Overlook, hike to the Long Dong Silver Spire, or explore Goblin Valley State Park.
GRAND STAIRCASE ESCALANTE NATIONAL MONUMENT: Nestled on one of the most scenic highways in the US, Grand Staircase is a massive National Monument that is home to incredible waterfalls, slot canyons, and remote outdoor adventures. It typically gets overshadowed by the Mighty 5 National Parks, but it is just as impressive.
BRYCE CANYON NATIONAL PARK: Bryce Canyon is an incredible amphitheater of sandstone hoodos. It is a compact park, so you can thoroughly explore Bryce Canyon National Park in just one day.
ZION NATIONAL PARK: Visit Utah’s most popular National Park. Hike the famous Angel’s Landing, the Narrows, and do the scenic drive. Zion is still on my list of parks to visit, and is currently experiencing lots of overcrowding issues. I plan to visit during the off season when we get a chance!